In modern web applications, real-time communication with the server is becoming typical scenario. HTML5 WebSockets opens up many exciting possibilities for creating robust real-time applications. WebSocket provides a full-duplex communication channel between a web browser and server over a single connection. Trading, chat, collaboration, multiplayer games are few examples of such applications. Multiple attempts have been made in past to bring real-time communication to the web. These attempts used non-standard techniques like long-polling, comet, flash to simulate a persistent connection to the server. These non-standard methods come with its challenges and overheads. WebSocket protocol is designed to allow smooth interaction between browser and server, it is being standardized by W3C. WebSocket protocol is TCP-based protocol, it uses HTTP for initial handshaking.
Server and client need to work in tandem to make WebSocket a reality. So, it needs to be supported by your server and browser. Chrome, Firefox, Safari, Opera, IE10 supports WebSocket protocols. It is important to have fallback mechanism whenever WebSocket is not available on the browser. Libraries uses long-polling or flash as a fallback mechanism. These fallback techniques aren’t most efficient but brings the same behavior.
Real-time applications introduce the need for a new set of patterns to your server and client side. Traditional server stacks for the web applications were designed for the request-response cycle, it might not do well when it comes to managing a large number of concurrent open connections. Following are the options for implementing real-time applications with ASP.Net MVC.
a) Hosted API
With this approach, you don’t have to deal with the infrastructure concerns like how well my web server would scale with a large number of persistent connections. Your user’s browser open WebSocket to the hosted API provider, your web sends updated to the API provider, which in turn sends it to the browsers. Typically you get the server side and client side libraries for publishing and subscribing to events. This could reduce part of the complexity and overhead of maintaining the infrastructure and code.
b) SignalR
Support for WebSocket has been introduced in IIS8 on Windows Server 2012/Windows 8. SignalR gracefully fallback to other techniques when WebSockets are not supported. So even if the browser supports WebSockets, but if your server is not running on Windows Server 2012/Windows 8, it is going to fallback to long polling. So because of this platform limitations, you will be running on the fallback mechanism most of the time as Windows Server 2012 is relatively new. Second part of this post implements the sample application using SignalR.
c) Self-Hosted with IIS8/Windows Server 2012/.Net 4.5
With WebSockets natively supported in Windows Server 2012 and IIS8, you could create real-time applications without the need for any third-party API or external libraries.
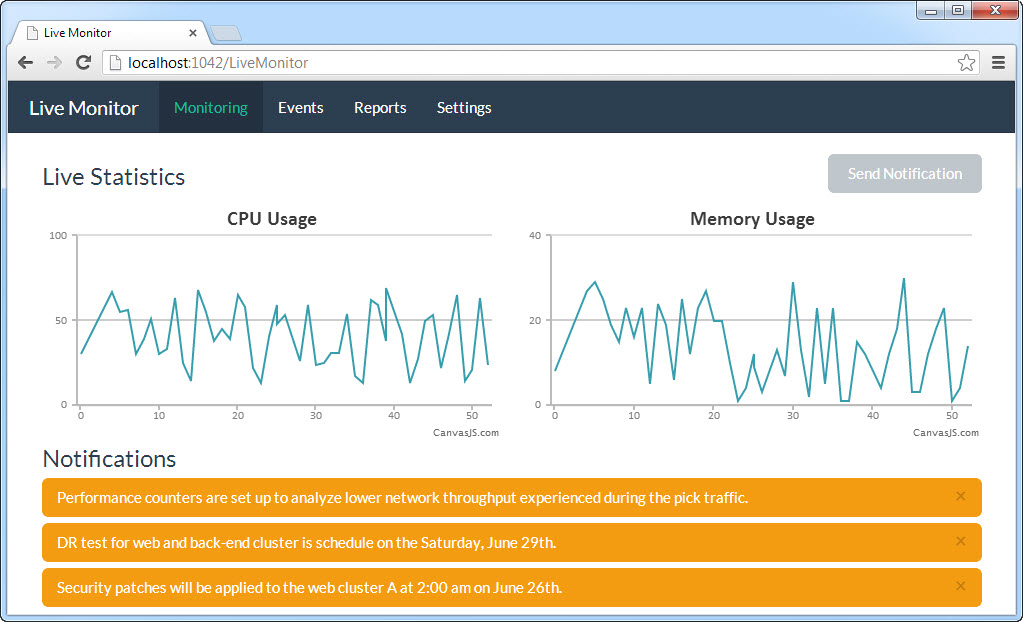
This post will use the first option - using hosted API. That is the least complex to implement of all three options. To make it more fun and see the WebSockets in action, I imagined up a web application that provides real-time usage statistics for the servers. As you can see in the following screenshot, it shows the real-time graph of CPU and memory usage while the lower half of the page shows the notifications. A simple console application publishes periodic CPU and memory usage updates. Any user could create notifications through the button on the upper right corner. The controller action publishes the notifications on the web server. The rest of the post will be a walk through of building this application.
I will be using the hosted API provider called Pusher. It provides the client-side JavaScript library for subscribing to updates. Pusher provides REST API for publishing the events. It also provides a .Net wrapper library that communicates with the REST API. We will be using the .Net library on the server side for publishing the updates.
Let’s wire up the client side
First of all, sign up for the free account at Pusher.com. This free sandbox account comes with limitation maximum number of clients that could communicate simultaneously and the number of messages you could send in the given timeframe. After signing up, g to ‘Your Apps’ and create a new app. It will display a set of key and secret key along with your application id. You will need these keys for publishing and subscribing to the events. Now, go ahead and include the Pusher client side library on your page.
<script type="text/javascript" src="http://js.pusher.com/2.0/pusher.min.js"></script>
Pusher uses channels and events for publishing and subscribing to events. I have two channels, first channel ‘stats_channel’ for publishing the statistics with event ‘update_event’. The second channel ‘notifications_channel’ for issuing notifications with event ‘new_event’. You could publish different events on the same channel. However, I chose to have separate channels for statistics and notifications.
Create the instance of Pusher client with key of your application and subscribe to a channel with its name. Next, bind the callback function for a specific event, this feature gets the update data published by the server as an argument. Here, I am just passing the data to a function to refresh the chart.
var pusher = new Pusher('b0d95df00dd6be817af7');
var channel = pusher.subscribe('stats_channel');

channel.bind('update_event',function(data){
    updateCPUChart(data);
    updateMemoryChart(data);
});
In a similar way, subscribe to the ‘notificatiions_channel’ to listen to ‘new_event’. That’s pretty much it you need on the client side.
Server side is equally straightforward…
You can download the .Net wrapper library for Pusher’s REST API from https://github.com/pusher/pusher-dotnet-server. Server side will need a secret key of your application in addition to the application id and the key. You could regenerate the secret key in case you expose it by mistake. Server side is as simple as creating the instance of Pusher and calling a trigger method on it with appropriate data.
pusher = new Pusher(APP_ID, APP_KEY, APP_SECRET);

var result = pusher.Trigger("stats_channel", "update_event", new { time = counter, cpu = cpuRandom.Next(10, 70), memory = memoryRandom .Next(1,32)});
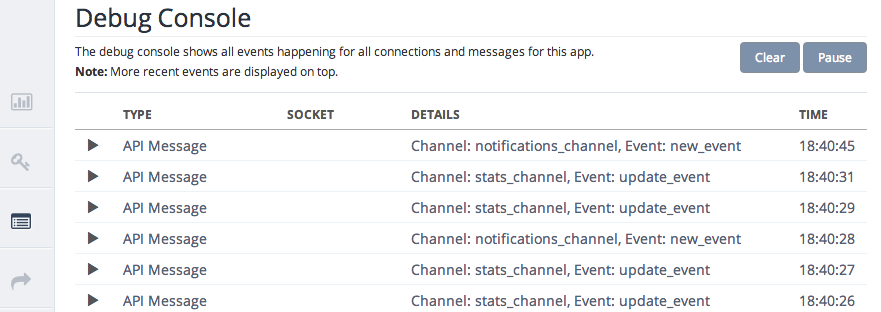
Pusher has a nice debug console, where you could trigger, monitor the client connections and events.
The code for the ASP.Net MVC application could be found at https://github.com/patelsan/LiveMonitor. Code for the console application sending the usage statistics could be found at https://github.com/patelsan/LiveBroadcaster.
I hope this was useful. I will cover other approaches for creating real-time applications using WebSockets in future posts.