Prototyping is a great way to engage users before even starting the development. Gaps in the requirements could be detected much earlier in the process and it encourages end users to share feedback. Recently I wanted to prototype an app, so I did some research about the available tools. There are plenty of prototyping tools available in the market, maybe even there is over supply of it. Choosing the right tool from dozens of available option could be hard. I wanted to prototype mobile app, which could be more demanding than a typical web application, especially if you want to incorporate subtle animations.
Many of the available tools falls in to category which could be called as “page-based” tools. In these page-based tools, you lay out the pages/ screens and connect them by defining clickable hot-spots. It generally allows to define transitions and some effects while navigating between the page. However, it doesn’t allow to animate specific elements within a page. InVision, Flinto, Market, etc. falls in this category.
Second category of the prototyping tools could be called “layer-based” tools - it gives you the control to animate the objects within a given screen or page. Animations could make a huge difference in the user experience of the mobile app. Many times you might not notice the subtle animations in the app, but that’s what makes it pleasant and intuitive to use. So, if you are prototyping mobile app where these interactions and animations are important, probably this is the kind of prototyping tool you want to go with. Framer, Principle, Form and Origami falls in this category.
After watching few demos, reading positive reviews, I decided to go with Framer.js and here is the video of the prototype I created with it. This app doesn’t really use sophisticated interactions, you could do much more with Framer.
Framer.js is an open source JavaScript framework for defining events like click, touch, drag. It could do spring physics, bezier curves, easing functions for creating animations and interactions. It has ability to import visual assets from Sketch and Photoshop. It’s based on webkit, so it works equally well on mobile, tablet and desktop. You define the prototype using JavaScript, so it opens up lots of possibilities. You could pull data from web or your back-end and incorporate into the prototype. Framer Studio is a mac app built on Framer.js - it provides nice editor, live preview, easy sharing and few more features - it’s definitely worth the price.
Framer Studio requires to use CoffeeScript, which I think could be slightly less intimidating for people coming from non-programming background.
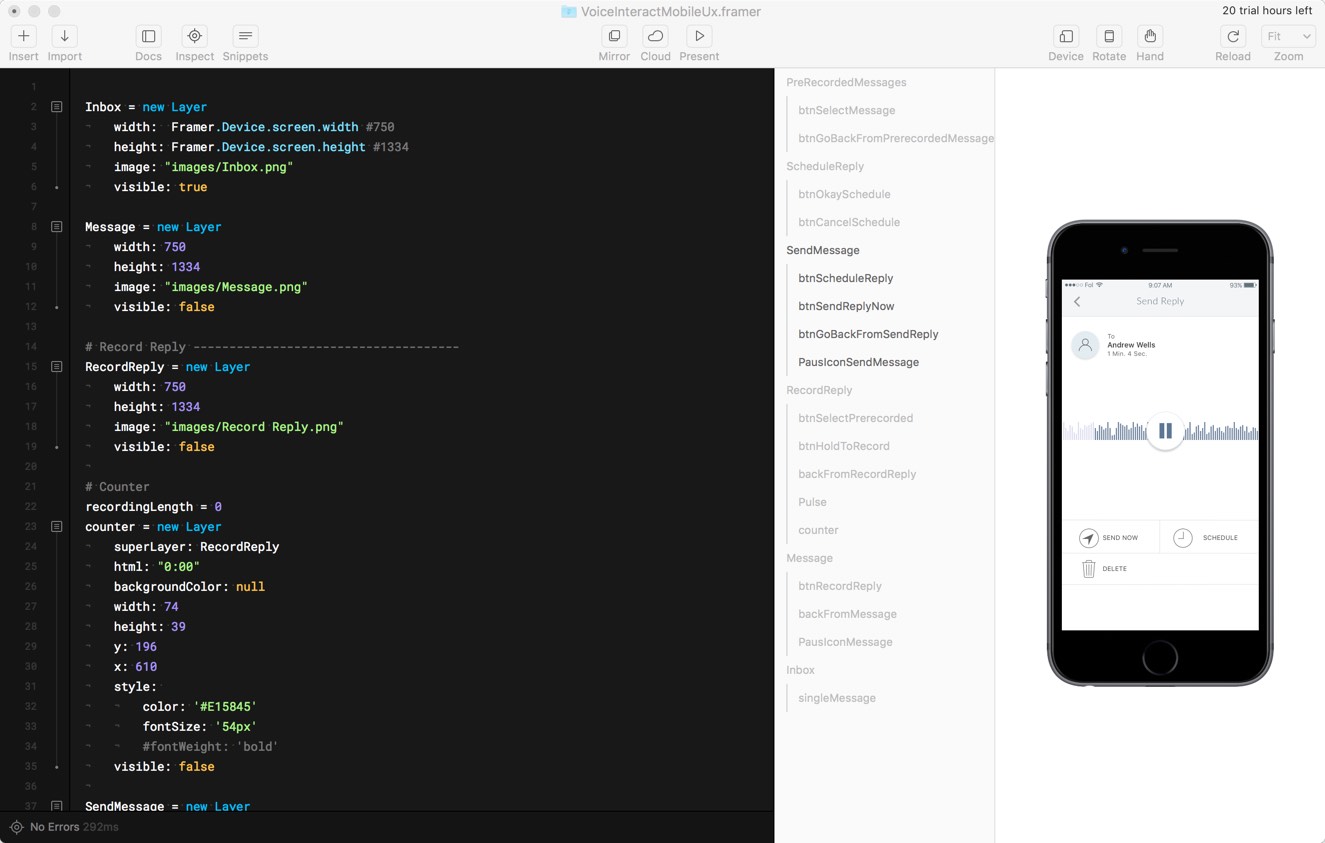
Each of the visual element is a Layer in Framer. You could assign properties like size, position, visibility, etc. along with the background image. Defined layer is referenced by a variable, named here as Inbox. You could program against this reference and modify it’s properties at runtime.
Inbox = new Layer
	width:  Framer.Device.screen.width
	height: Framer.Device.screen.height
	image: "images/Inbox.png"
	visible: true
You could also define sub-layers, which might be an image or simply hold html as shown in the following example. You could style the layer and dynamically set the html, you could pull the data from your back-end and dynamically create set of elements to render it in the prototype.
counter = new Layer
	superLayer: RecordReply
	html: "0:00"
	backgroundColor: null
	width: 74
	height: 39
	y: 196
	x: 610
	style:
		color: '#E15845'
		fontSize: '54px'
	visible: false
Creating user interaction points(hot-spot/ button) is as easy as subscribing to the click event. In this click event handler, I am hiding a layer and making another layer visible with spring animation:
btnSelectMessage.on Events.Click, ->
	PreRecordedMessages.visible = false
	SendMessage.x = Screen.width
	SendMessage.visible = true
	SendMessage.animate
		properties:
			x: 0
		curve: "spring(450,55,0)"
Animations could be defined using Animation object
# Declare the animations
pulseShrinkAnimation = new Animation({
	layer: Pulse,
	properties: {scale: 1.2},
	options: { time: 0.4},
	curve: "ease-out"
})

pulseExpandAnimation = pulseShrinkAnimation.reverse()

pulseShrinkAnimation.on(Events.AnimationEnd, pulseExpandAnimation.start)
pulseExpandAnimation.on(Events.AnimationEnd, pulseShrinkAnimation.start)
And of course you could define the standalone functions:
formatSeconds = (sec)->
	if(sec.toString().length == 1)
		return "0#{sec.toString()}"
	else
		return sec.toString()