Yeoman, Grunt, Bower toolchain opens up lots of possibility of automating the deployment workflow. I believe one of the factors influencing how often the application gets deployed is the deployment process itself. If deployment process involves series of manual steps, it could be error-prone, and you are likely to deploy less frequently. I firmly believe in making the deployment process as friction-free as possible. In this post, I would scratch the surface and explore a primary deployment scenarios with Yeoman, Grunt, Bower toolchain and Heroku as a cloud platform.
In this post, I am going to cover the deployment of the frontend-only application. This would be applicable where
- It’s a backend-less application, which uses Backend as a Service(or BaaS) like StackMob, Kinvey, FireBase, Parse
- It’s consuming API, which is hosted elsewhere
- It’s simply a prototype you want to share with others
If you don’t have Yeoman installed already, get it by
npm install -g yo
We will be using the angular generator for scaffolding our frontend-only AngularJS app. Install the generator by
npm install -g generator-angular
Create an app by optionally passing the name (you need to run generate command in the directory where you would like to create the application)
yo angular [app-name]
Yeoman comes with built-in grunt task for preparing your application for deployment. Running it generates optimized version of your application ready for deployment. Go ahead and try it
grunt build
You will see a directory called dist created at the root of your application with minified scripts and CSS. Now, we need some task to version control the build code we just generated, tag it and push to remote repository for deployment. Also, we would like to keep our deployment bundle in sync with our main code repository. We will be using a grunt plug-in called grunt-build-control. This plug-in comes could push code to Heroku and it comes with safety check that makes sure your source code repository is clean while deploying the code. Install the plug-in by
npm install grunt-build-control --save-dev
After the plugin has been installed, load it in your Gruntfile with:
grunt.loadNpmTasks('grunt-build-control');
Let’s create the Heroku app where we will be deploying this sample app. You could create the app through Heroku dashboard using the UI or by using the heroku toolbelt on the command prompt. We will need the git URL to this application(it’s under the settings tab if you are using the UI. It will be displayed on the console if you used command prompt).
We need to configure the build-control by adding following block in the grunt.initConfig call
buildcontrol: {
  options: {
      dir: 'dist',
      commit: true,
      push: true,
      message: 'Built %sourceName% from commit %sourceCommit% on branch %sourceBranch%'
  },
  heroku: {
      options: {
          remote: 'git@heroku.com:Your-Sample-App.git',
          branch: 'master',
          tag: pkg.version
      }
  }
}
Replace the remote git address with your application’s URL. In theory, we are ready to deploy our application to Heroku. However, Heroku requires a web server to serve our application files. If we try deploying now, Heroku is going to reject it. We will add node to our application, so Heroku would see it as node application and would use express to serve our files. Let’s configure our app in 3 small steps
1) Create package.json file under the app directory and add express as a dependency as shown below
{
    "name": "yosampleapp",
    "version": "0.0.0",
    "dependencies": {
        "express": "~3.4.8"
    }
}
2) Create Procfile(name is case-sensitive) file under the app directory with following content
web: node server.js
3) Finally create ‘server.js’ under app directory with following code
var express = require('express');
var app = express();

app.use(express.static(__dirname)); // Current directory is root
app.listen(process.env.PORT || 5000);
We need to update the build task to copy these 3 files to deployment directory. In your gruntfile, find the dist - copy and add these three files as shown below
copy: {
      dist: {
        files: [{
          expand: true,
          dot: true,
          cwd: '<%= yeoman.app %>',
          dest: '<%= yeoman.dist %>',
          src: [
            '*.{ico,png,txt}',
            '.htaccess',
            '*.html',
            'views/{,*/}*.html',
            'bower_components/**/*',
            'images/{,*/}*.{webp}',
            'fonts/*',
            'package.json', //add this
            'server.js',    //this
            'Procfile'		//and this
          ]
        }
Build the app so these new files gets copied over to deployment directory
grunt build
Now, go ahead and run
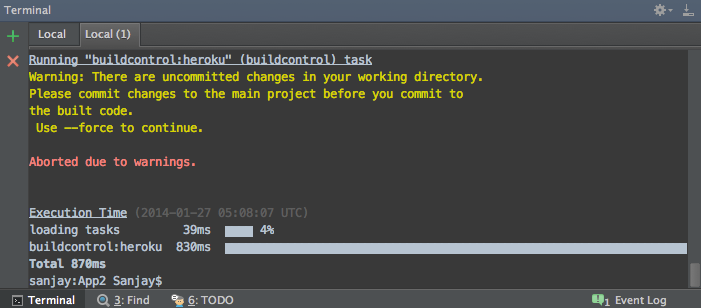
grunt buildcontrol:heroku
And… boom, you will get an error saying you have uncommitted changes.

This is the safety check that would ensure what are deploying is committed to the repository. Create a local git repository and commit your application to it
git init
git add .
git commit -m 'initial commit'
and run the build control command again, this time you will get a different error. This error is due to a bug in build-control, which causes an error while doing the first deployment. We need to make the first commit manually. The issue has been opened on GitHub and maintainer is aware of it, so if you see status of this bug closed, you need not follow this step.
//CD to the dist directory
git add .
git commit -m 'initial commit'
Now, run the build control command again and it will deploy the application to Heroku. You are ready to share your Heroku application URL with the world. Code for this sample application could be found on github.